Bento Stripe Integration


Overview
The Bento Stripe Integration offers two core functionalities:
- Event Tracking: Automatically track key Stripe events for your subscribers
- Data Management: Update user data and record lifetime value (LTV) metrics
- Flow Triggers: Trigger workflows based on Stripe events
Requirements
- Active Bento account with a site created
- Active Stripe account
Installation Steps
You can connect Stripe to Bento in a few steps.
To install the Stripe App, you must login to Bento, select your team, and from your home page look for the Apps in the left side menu. It has a little power plug icon.Bento Teams
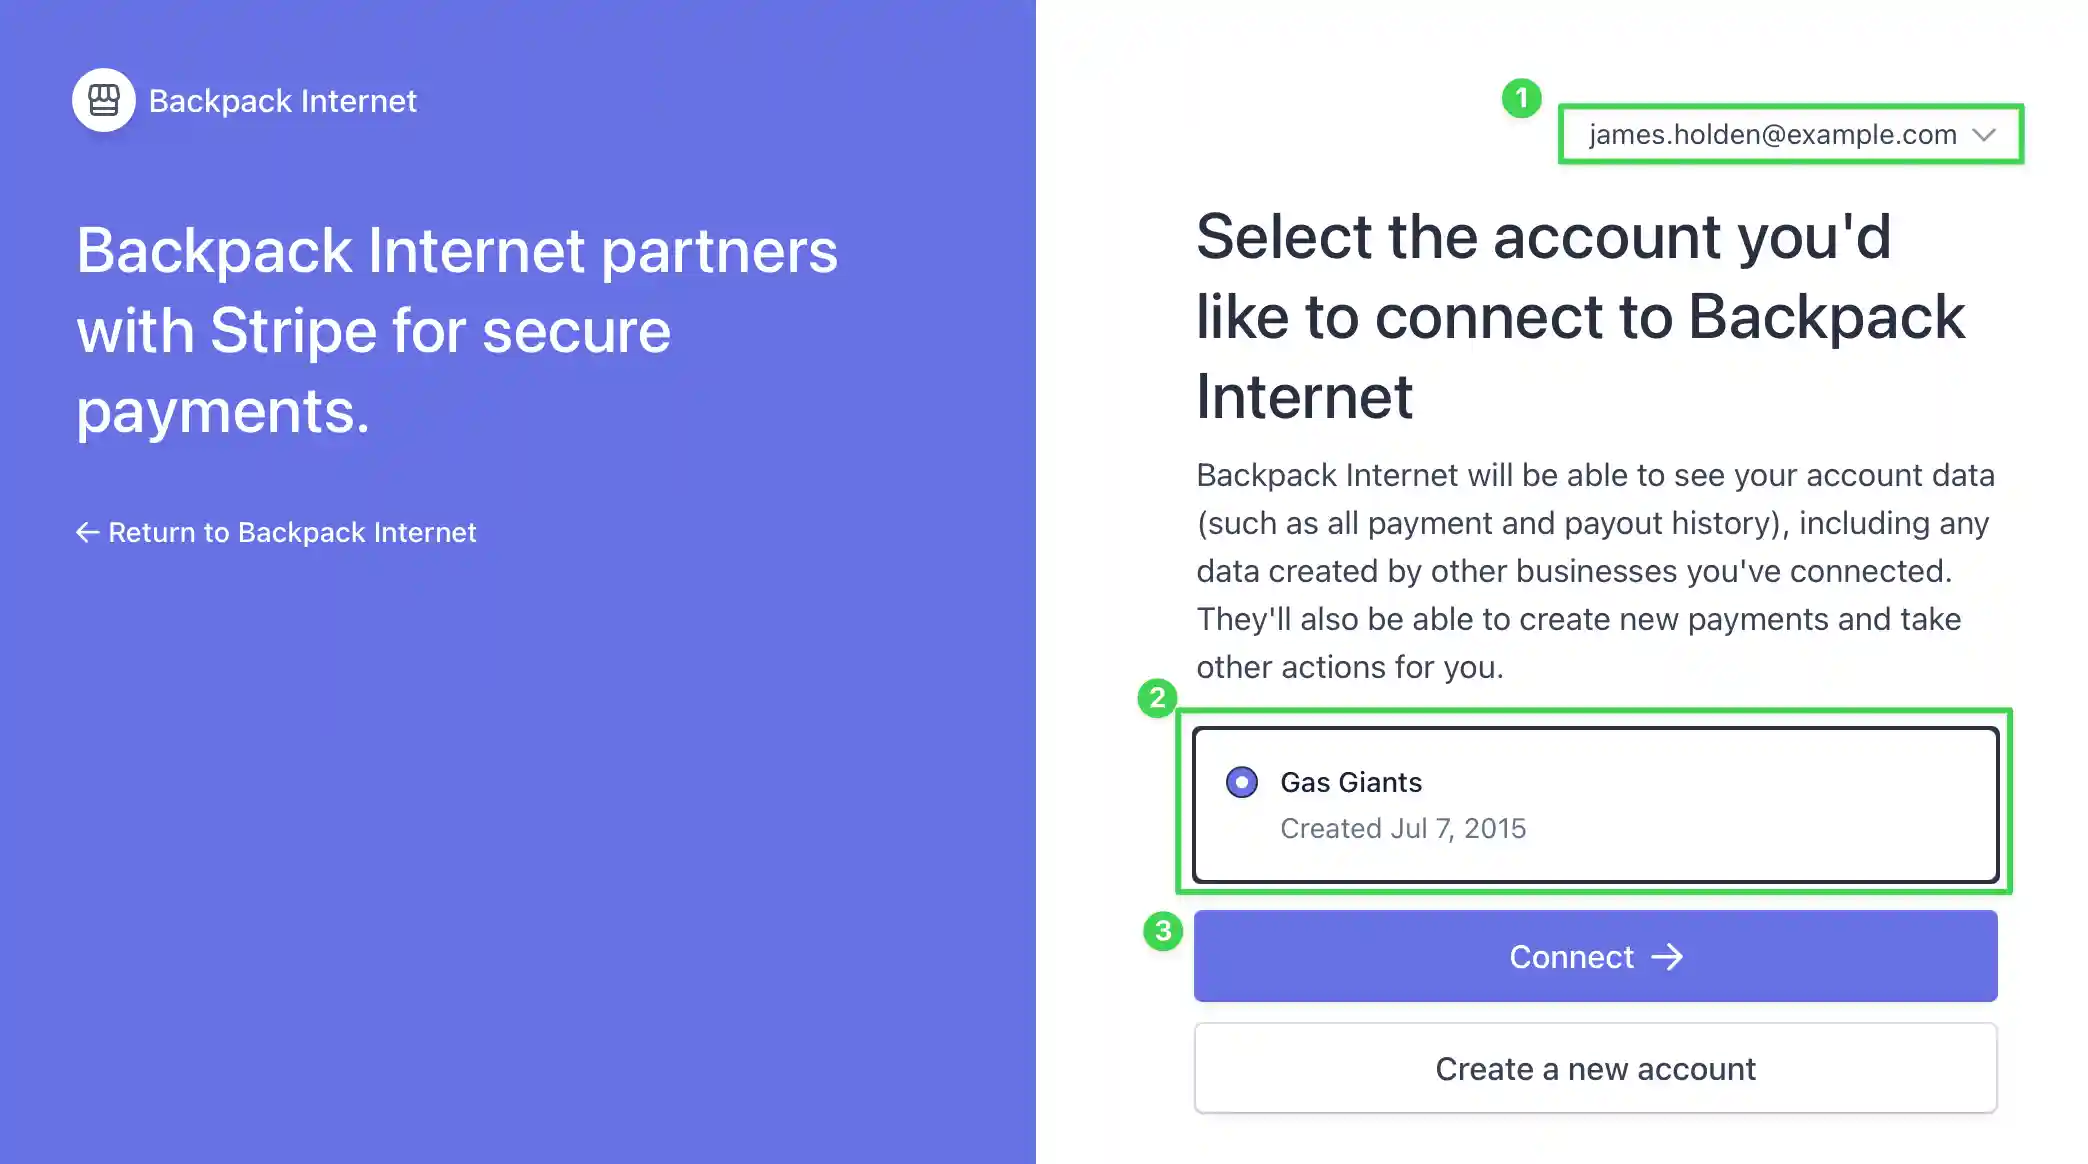
You will be prompted to sign into Stripe if you are not already 1.
Stripe will ask if you want to 3 connect to Backpack Internet (Bento). It will also ask you to select the stripe
account you would like to connect with 2.
Once you have clicked connect you will be redirected back to Bento to the Connect Stripe screen. You will see the
Bento Site you connected 1, the stripe account you connected 2 with and a settings and disconnect buttons 3.

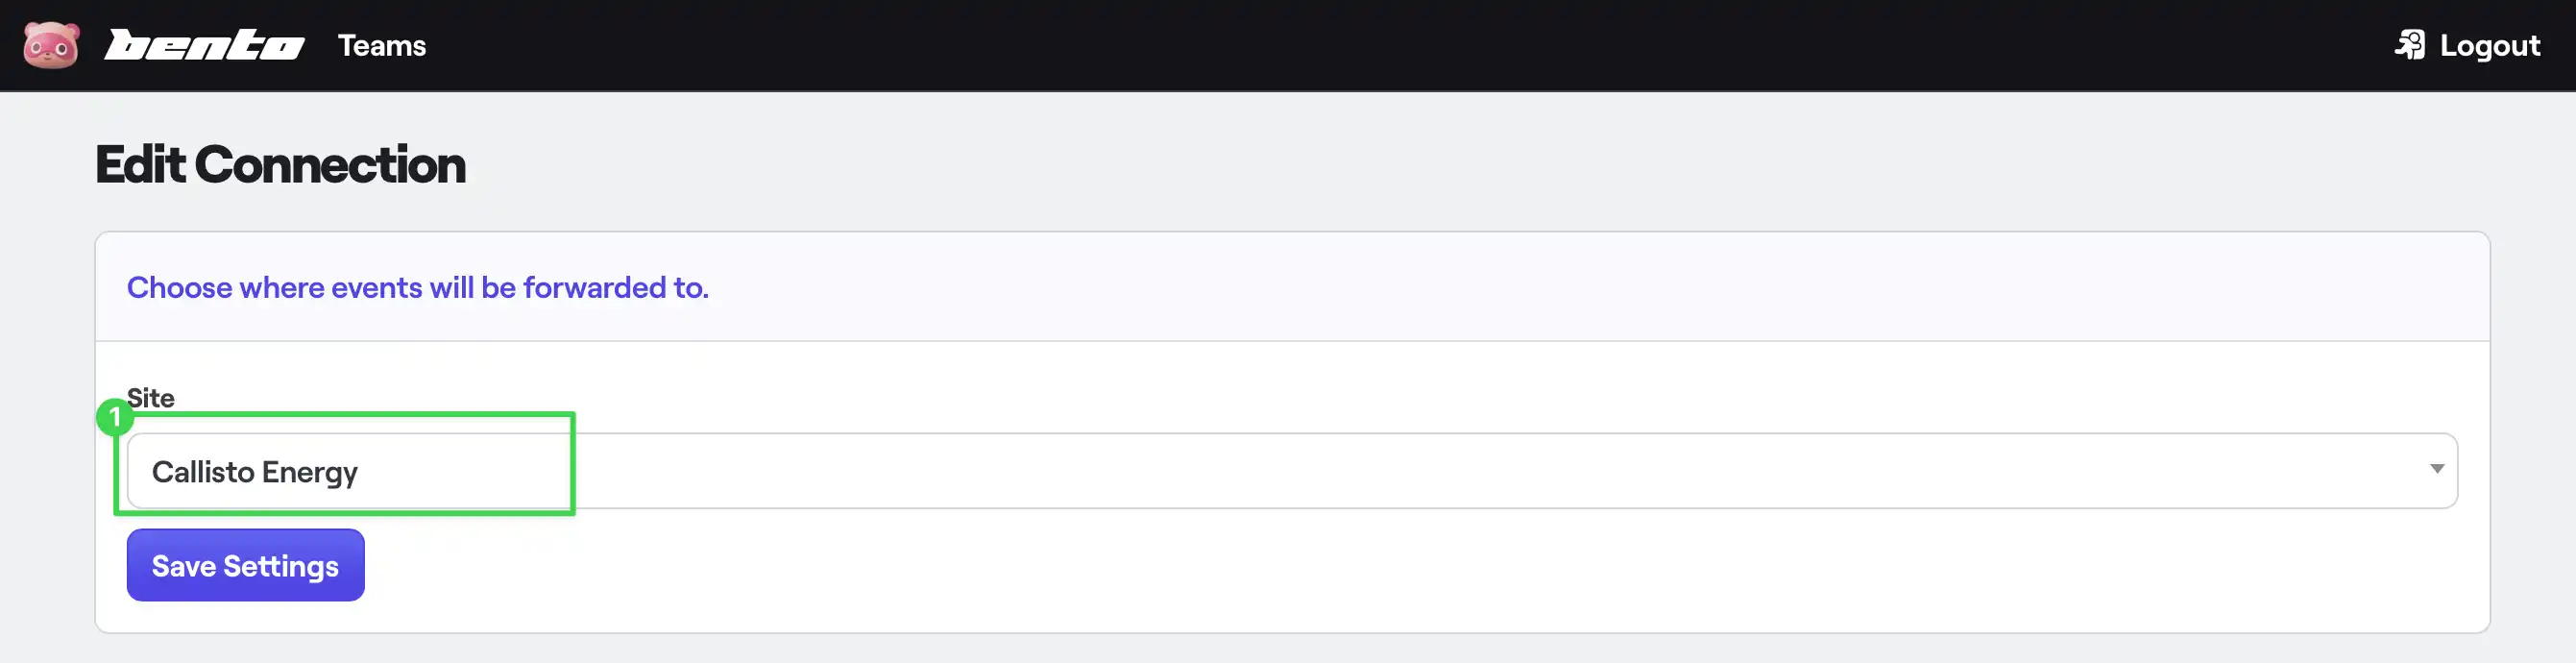
Clicking settings will provide you with a drop down list of Bento sites in your account 1. Should you need to
change the site you want stripe events to appear in you would make that change here.
How the connection works
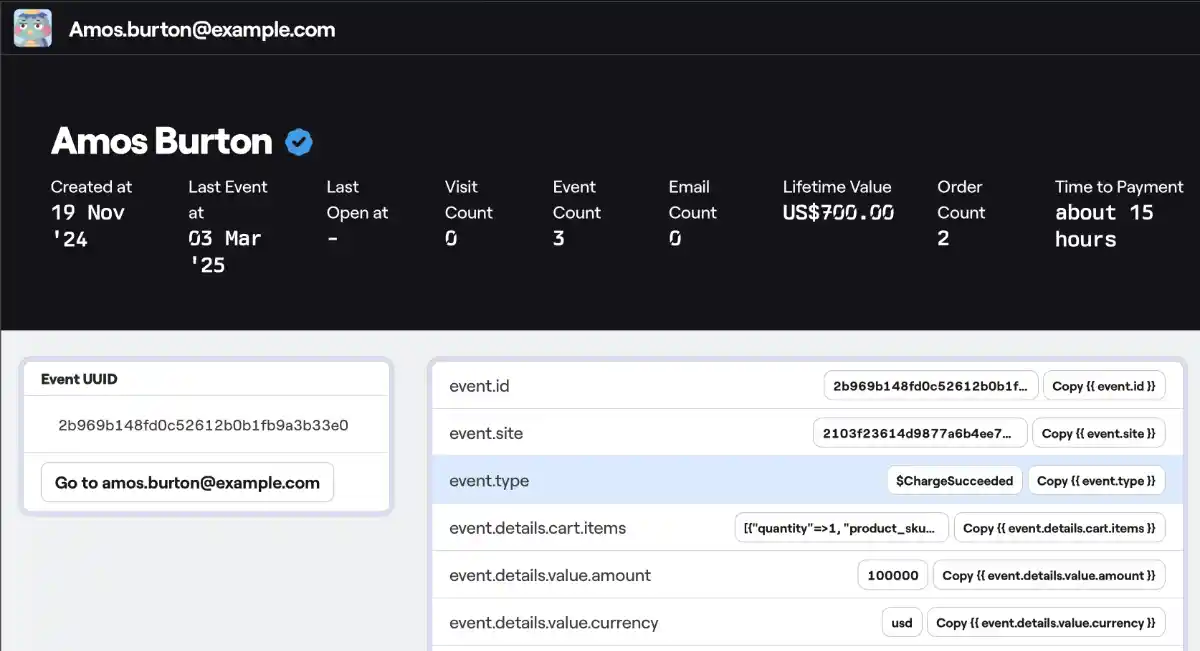
When purchase events happen inside stripe, those events are forwarded to Bento in the form of a webhook. The common
event you will be looking for is $ChargeSucceeded which signals that a payment was successfully processed by stripe.
Depending on your use case there will be other data present, such as value, currency, the cart items if there are any.
These events details will be valuable as data to use in flows.
Sample Event