Bento SendOwl Integration


Overview
The Bento sendOwl Integration offers two core functionalities:
- Event Tracking: Automatically track key SendOwl events for your subscribers
- Data Management: Update user data and record lifetime value (LTV) metrics
Requirements
- An approved Bento account
- A SendOwl account
- The bento Tracking script - for user tracking on the website
- Webhook end point - Syncs purchase events to bento
Tracking Script Installation
1
In sendowlHead to the
tracking script area from the SendOwl menu.2
Copy the Tracking ScriptCopy the Tracking Script. If you it asks you to replace the
site_uuid with your site uuid, do so from the bento teams screen.3
Paste the Tracking ScriptIn the Global Header text field paste in the tracking code. Double check that it looks the same as what you copied from bento.
4
Save the HeaderClick
save and you are done.Webhook Setup
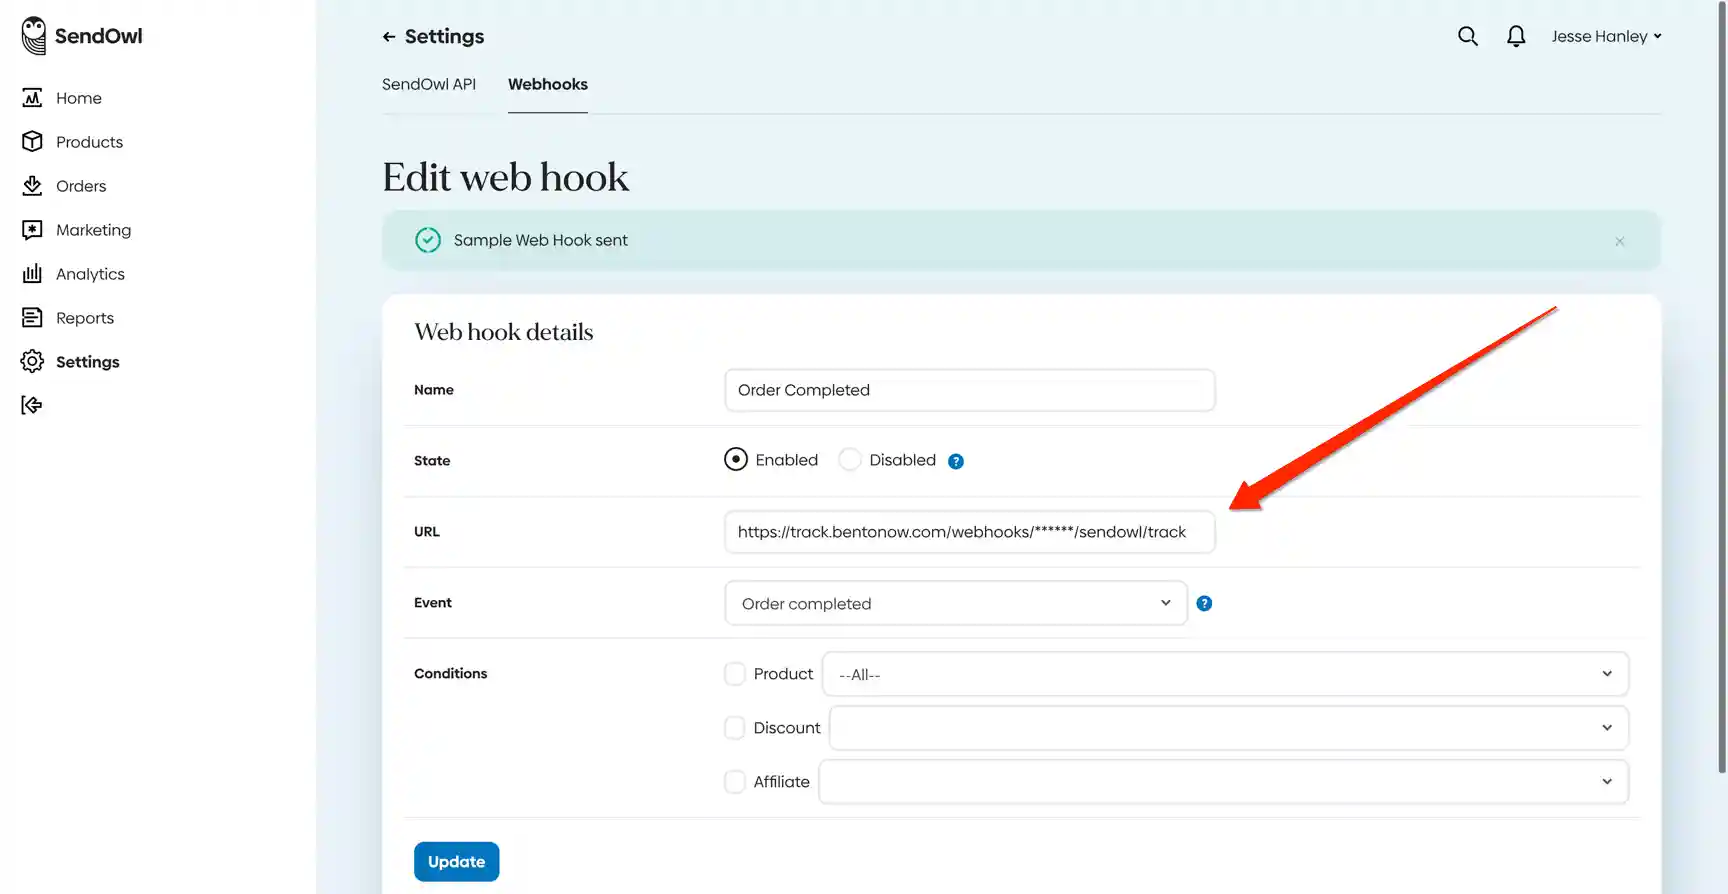
1
In SendowlIn the SendOwl menu select
Settings2
On the Settings screenIn the top tabs click
webhooks, and click Create Webhook button to create a new webhook.3
Create the webhookGive the webhook a name, like
Bento or something similar.4
Set the state of the webhookMake sure the state is set to
enabled5
Set the Webhook URLIn the Webhook URL field, paste the url Bento Webhook URL, be sure to substitute the
site_uuid with the correct site you want to sent events to from your account teams screen if its not already there.6
Define the Event typeIn the
events drop down, select order new7
Save the WebhookSave your new connection

How the connection works
When a user browses SendOwl site, you will see $page data appear in bento. Once that user authenticates that data
will be attributed to the correct subscriber in bento. When the user make a purchase we will sync the data via the
webhook you configured to appear as a purchase event in Bento. This interaction allows you to track LTV, start
automations and flows based on purchase events and more.