Setup Hover DNS for Bento
This guide will walk you through configuring the required DNS records in Hover to authenticate your domain for Bento email sending. By adding these records, you'll ensure optimal email deliverability and prevent your emails from being marked as spam.
Prerequisites
Before starting, ensure you have:
- Access to your Hover account
- Your domain registered with Hover
- Administrator permissions to modify DNS records
Required DNS Records
You'll need to add 6 DNS records to your domain to begin sending emails with Bento:
Required DNS Records
example              CNAME  example.test.sendgrid.net
bbb._domainkey       CNAME  bbb.domainkey.example.test.sendgrid.net
bbb2._domainkey      CNAME  bbb2.domainkey.example.test.sendgrid.net
bento                CNAME  ga.bentoemail.com
bento3180._domainkey TXT    k=rsa; p=example...
_dmarc               TXT    v=DMARC1; p=quarantine; adkim=s
System > DNS. The values above are examples - use the actual values provided in your Bento account.- Log into your Hover account at hover.com
- Navigate to Domains from the main menu
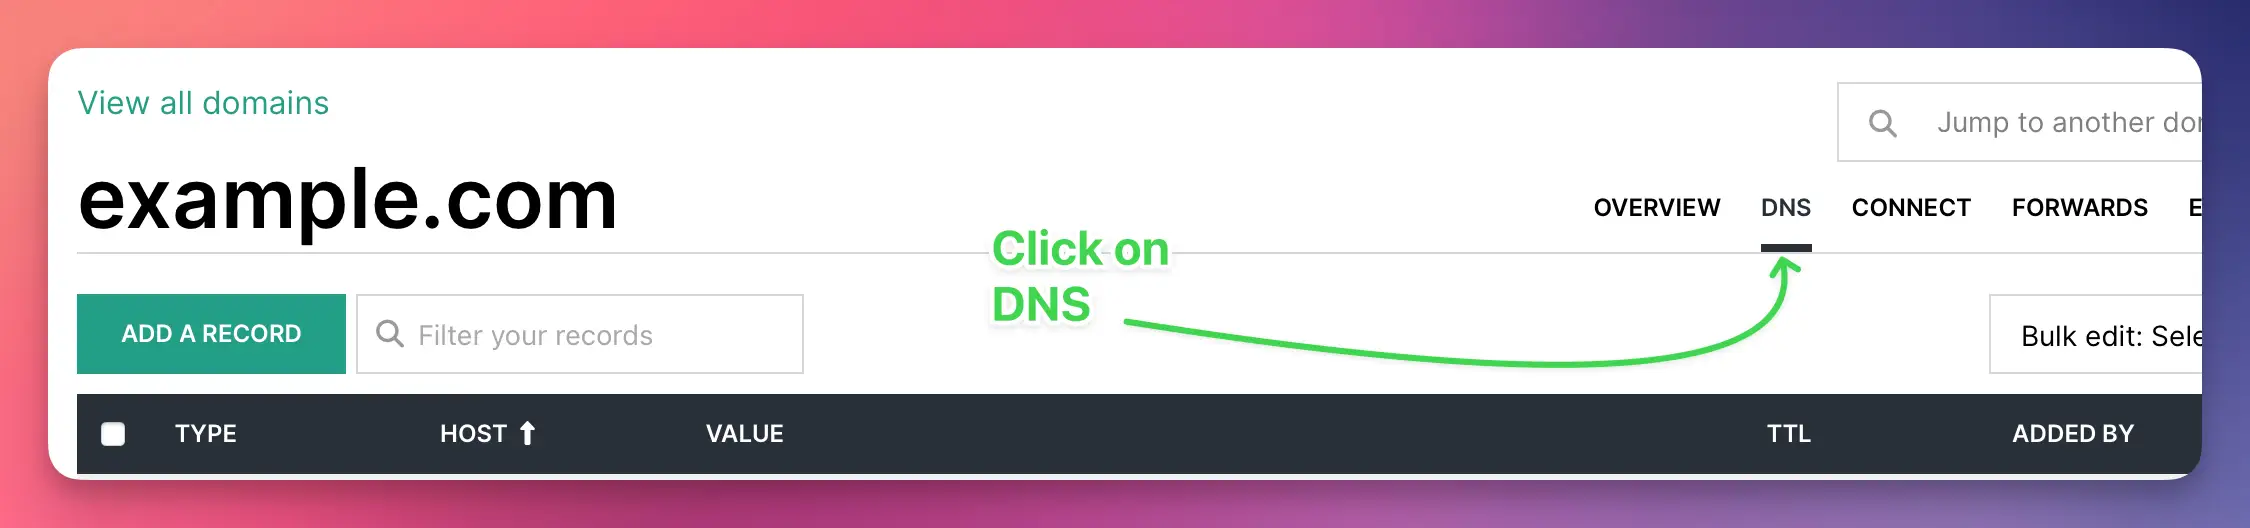
- Click on your domain name to open its settings
- Click on the DNS tab
- You'll see the DNS records management interface
You'll need to add 4 CNAME records. Let's start with the first one:
- Click Add New under DNS records
- Select CNAME as the record type
- In the Name field, enter:
example - In the Target field, enter:
example.test.sendgrid.net - Leave TTL at default (typically 1 hour)
- Click Save
Repeat this process for the remaining CNAME records for example:
bbb._domainkey→bbb.domainkey.example.test.sendgrid.netbbb2._domainkey→bbb2.domainkey.example.test.sendgrid.netbento→ga.bentoemail.com
SYSTEM -> DNS in the menu.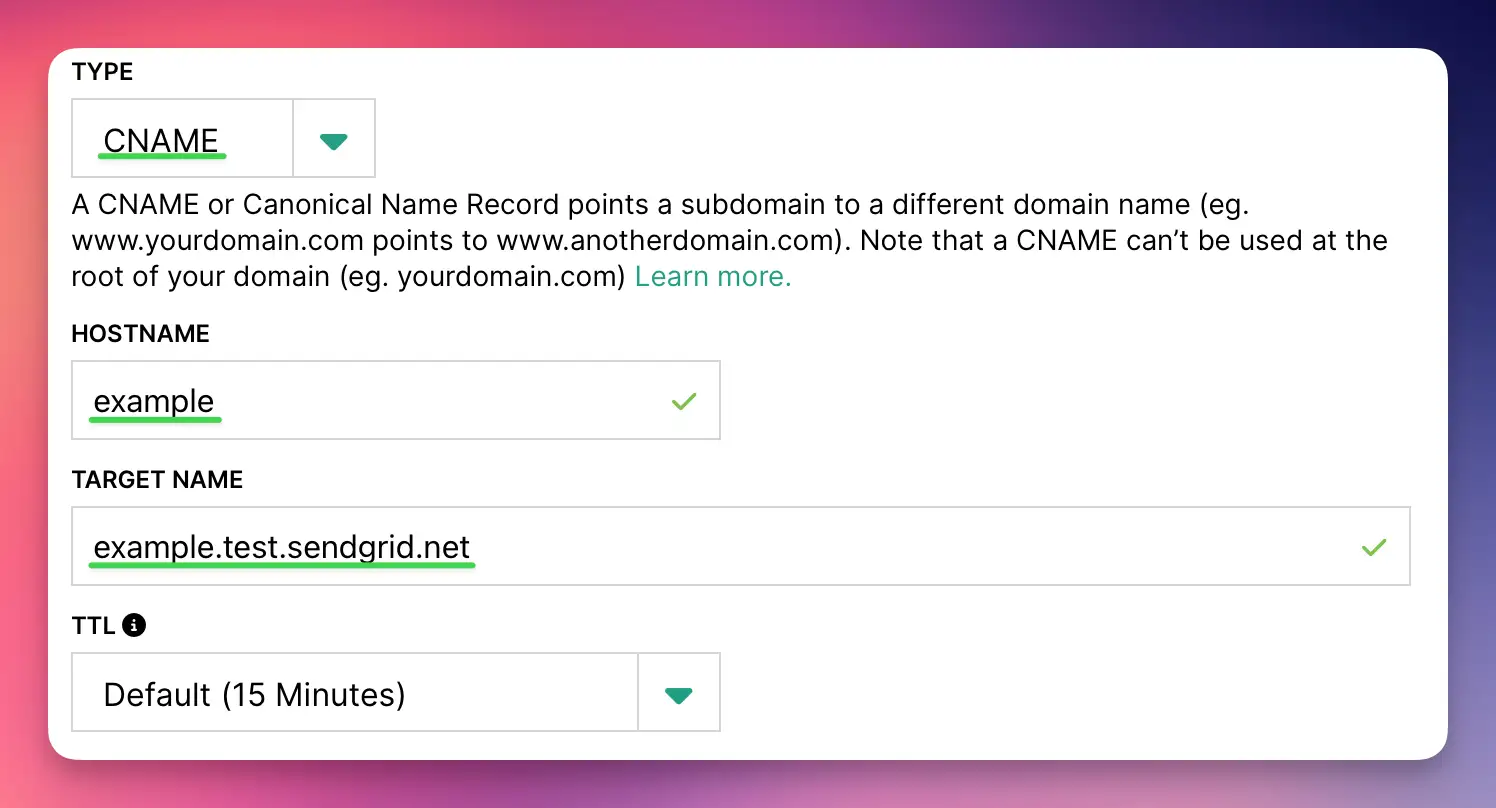
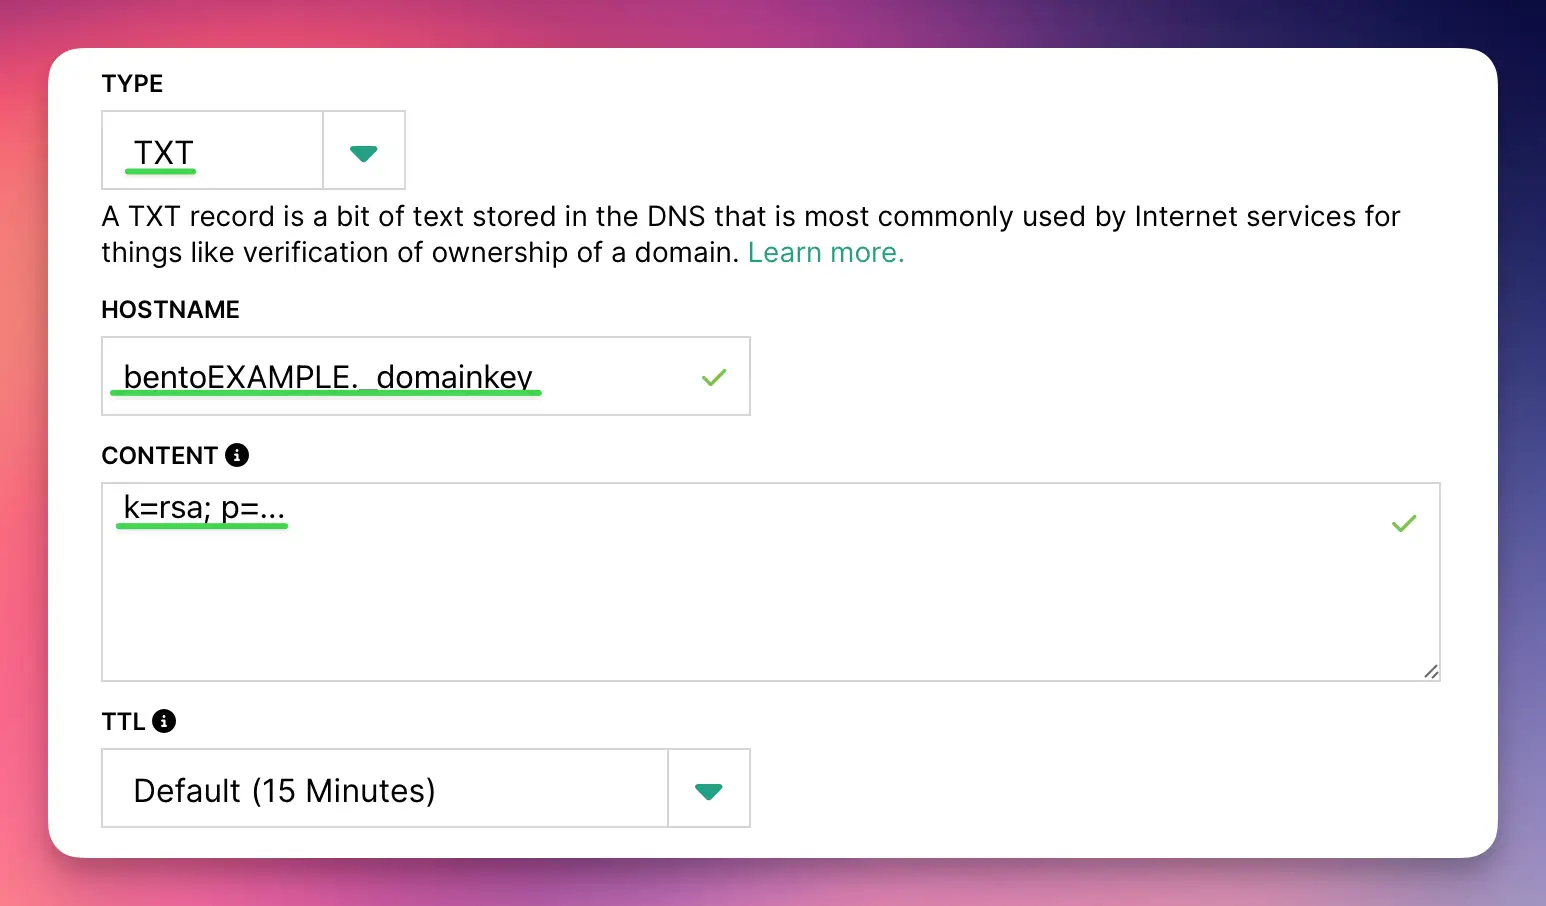
Now you'll add 2 TXT records. Let's start with the DKIM record:
- Click Add New
- Select TXT as the record type
- In the Name field, enter:
bentoEXAMPLE._domainkey - In the Content field, enter the full DKIM key (starts with k=rsa; p=...)
- Leave TTL as default
- Click Save
Then add the DMARC record:
- Click Add New again
- Select TXT as the record type
- In the Name field, enter:
_dmarc - In the Content field, enter:
v=DMARC1; p=quarantine; adkim=s - Leave TTL as default
- Click Save
After adding all 6 DNS records, you need to verify them in Bento:
- Return to Bento and navigate to
SYSTEM ->DNS - Wait 5-10 minutes for DNS propagation (can take up to 48 hours)
- Click the Check button next to each DNS record
- Properly configured records will show a green checkmark and blue text
- If any records fail verification, double-check the values and TTL settings
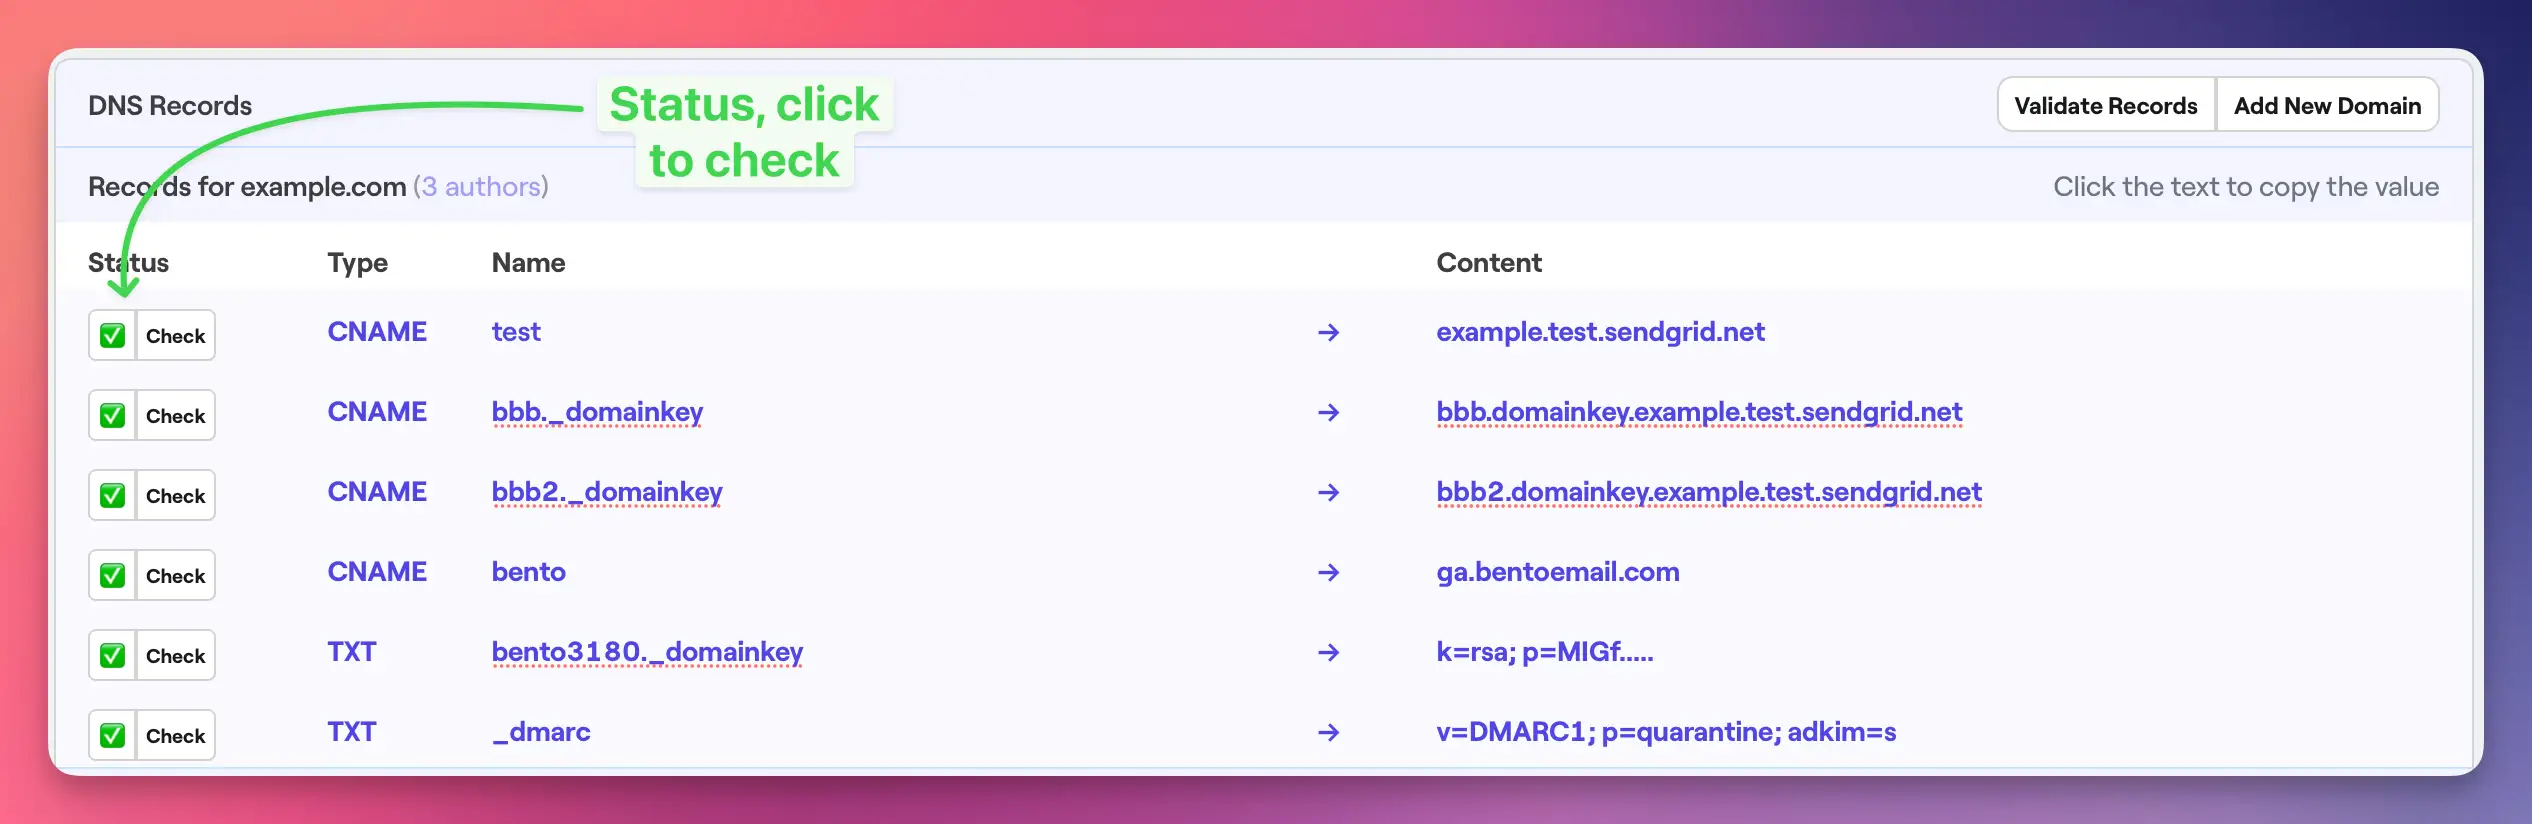
Once complete, your Hover DNS records should as follows:
All 6 records should be visible with:
- 4 CNAME records with proper Host Name and Target Name
- 2 TXT records with proper Host Name and Text Value
- All records showing default TTL values
- Status indicating successful creation
Hover Notes
- Field Names: Hover uses "Host Name" and "Target Name" or "Text Value" depending on record type
- TTL Defaults: Typically 1 hour (3600 seconds)
- Propagation: Changes usually propagate within 1-2 hours
- TXT Record Quoting: Hover does not automatically quote TXT values
Troubleshooting
If you encounter issues:
- Records not verifying: Double-check that all values match exactly what's shown in your Bento account
- TXT record formatting: Verify that long DKIM keys are complete and properly formatted
- DNS propagation: Wait up to 48 hours for global DNS propagation
- TTL settings: Use default TTL values unless you have specific requirements
Next Steps
Once all DNS records are verified in Bento:
- Your domain is now authenticated for email sending
- You can start sending emails with improved deliverability
- Monitor your email performance in the Bento dashboard
If you have any questions, feel free to ask in the Bento Discord!