How to Set Up a Confirmed Opt-In (COI) Flow in Bento
In this tutorial, we'll run you through how to create a confirmed opt-in (COI) flow inside Bento.
Confirmed Opt-in (COI) is a gold standard practice in both deliverability, compliance, and security. It ensures that the users receiving emails have explicitly confirmed their consent, which significantly reduces the chances of spam complaints and increases the quality of your email list. By using COI, you are not only complying with legal requirements such as in countries like Germany, but also ensuring that important emails and personal information is going to the right place. Very scary people sit on commonly mispelled domains (i.e gmil.com instead of gmail.com) and wait to get valuable information!
Whilst implementing COI is important, we also strongly recommend following our deliverability guide which includes recommendations such as rate limiting your forms, adding a recaptcha, and much more. The more you get into security the more you will protect your users and your own email marketing performance!
Managing Opt-ins in Bento
Bento offers complete flexibility in how you manage your users and their subscription status. Some users may want to run a COI automation for every single sign up, whilst others may want to run it for only certain sign ups as they may have confirmed the email elsewhere (i.e after account sign up).
Before building your flow, we recommend mapping out the different ways someone can be added to your Bento account and deciding how you want to handle them.
i.e you may want to run a COI flow after a blog sign-up but not after an account sign up.
Anything where someone could mistype an address, you probably will want to run COI.
Outline of the Flow
Here is an example confirmed opt-in flow example:
Breakdown
- When someone signs up on the website we send in a custom event via the API. This could also be an event from Shopify, Stripe, WooCommerce, or another integration.
- We immediately unsubscribe them and leave a "double opt-in" reason. This lets you search and segment based on the unsubscribe reason later.
- Send a transactional email (which ignores the fact they are unsubscribed) with a link to confirm their subscription, like
https://yourdomain.com/double-opt-in. Make it a nice branded page with an offer or next steps. Don't be boring! - Now that is set up we can then use a "New Email Click" trigger to catch when they click the confirmation link across any of our emails (Bento's click tracking automatically blocks bot activity for more legitimate consent).
- Already Verified so we are skipping the COI steps and just subscribing them.
- We subscribe them or update the unsubscription from step 2.
- Update a custom field called
consented_viato record how they opted in. This is useful if you ever get audited or a user claims they never subscribed.
Now that you understand how the flow works and what you are accomplishing at each step lets dive into how this looks inside Bento.
Building the Flow
Building this flow is made up of two "paths".
Path 1: User signs up
Let's look at the first path, from say, your website form. This part of the flow is made up of 3 steps.
double opt-in. This allows you to later search and analyze the conversion rate of sign-ups vs double opt-ins.https://yourdomain.com/double-opt-in. {{ visitor.confirmation_url | hyperlink: "Confirm Email" }}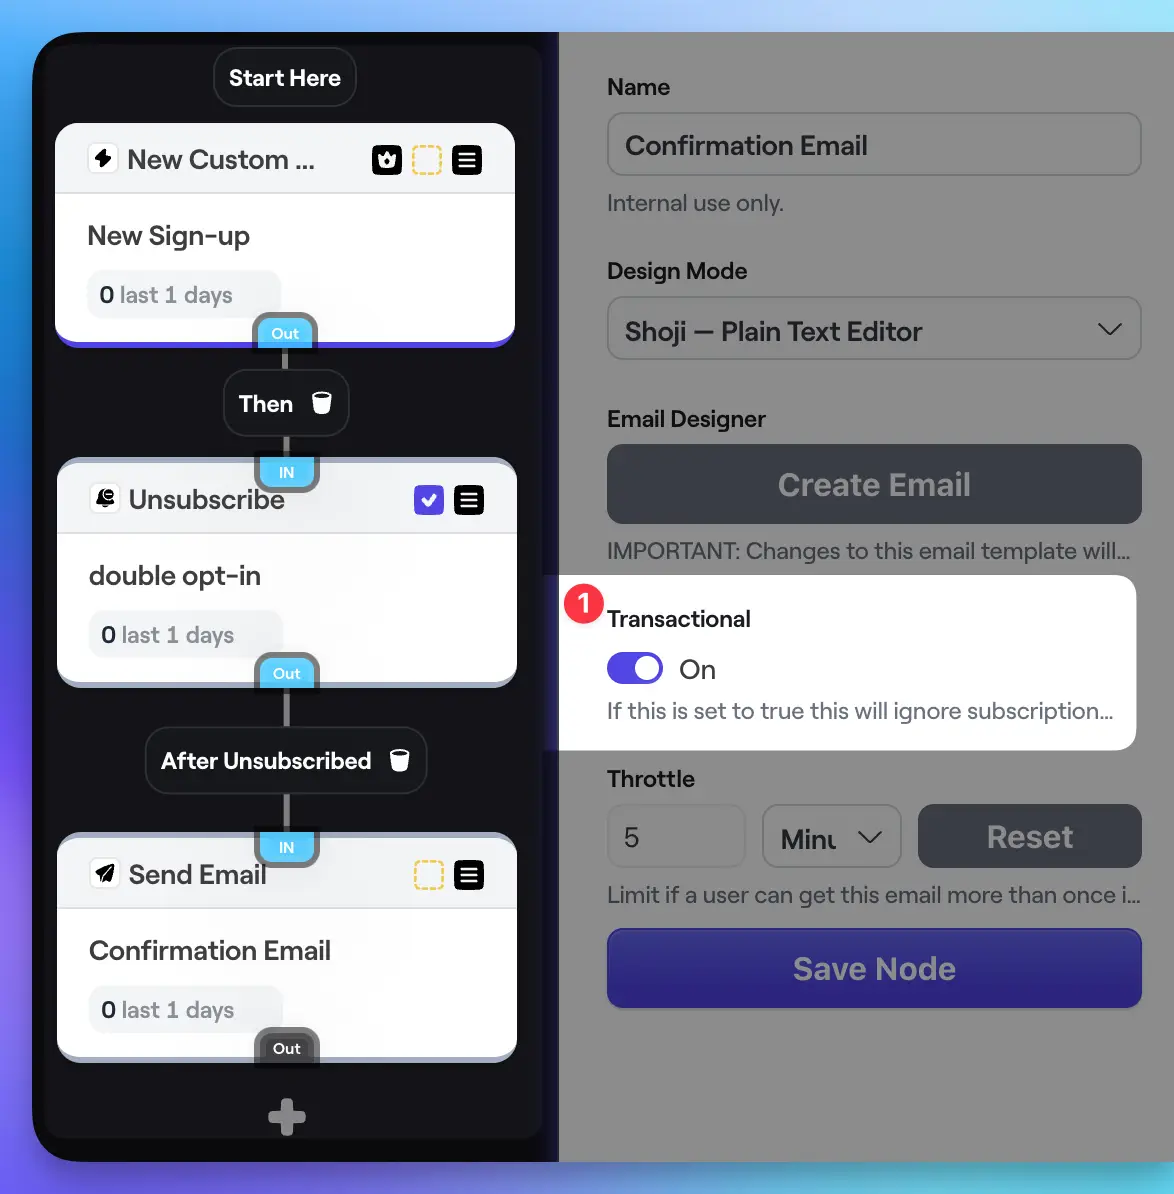
Path 2: User clicks confirmation link
Now, we need to create a new path in the same flow for when the user clicks the confirmation link.
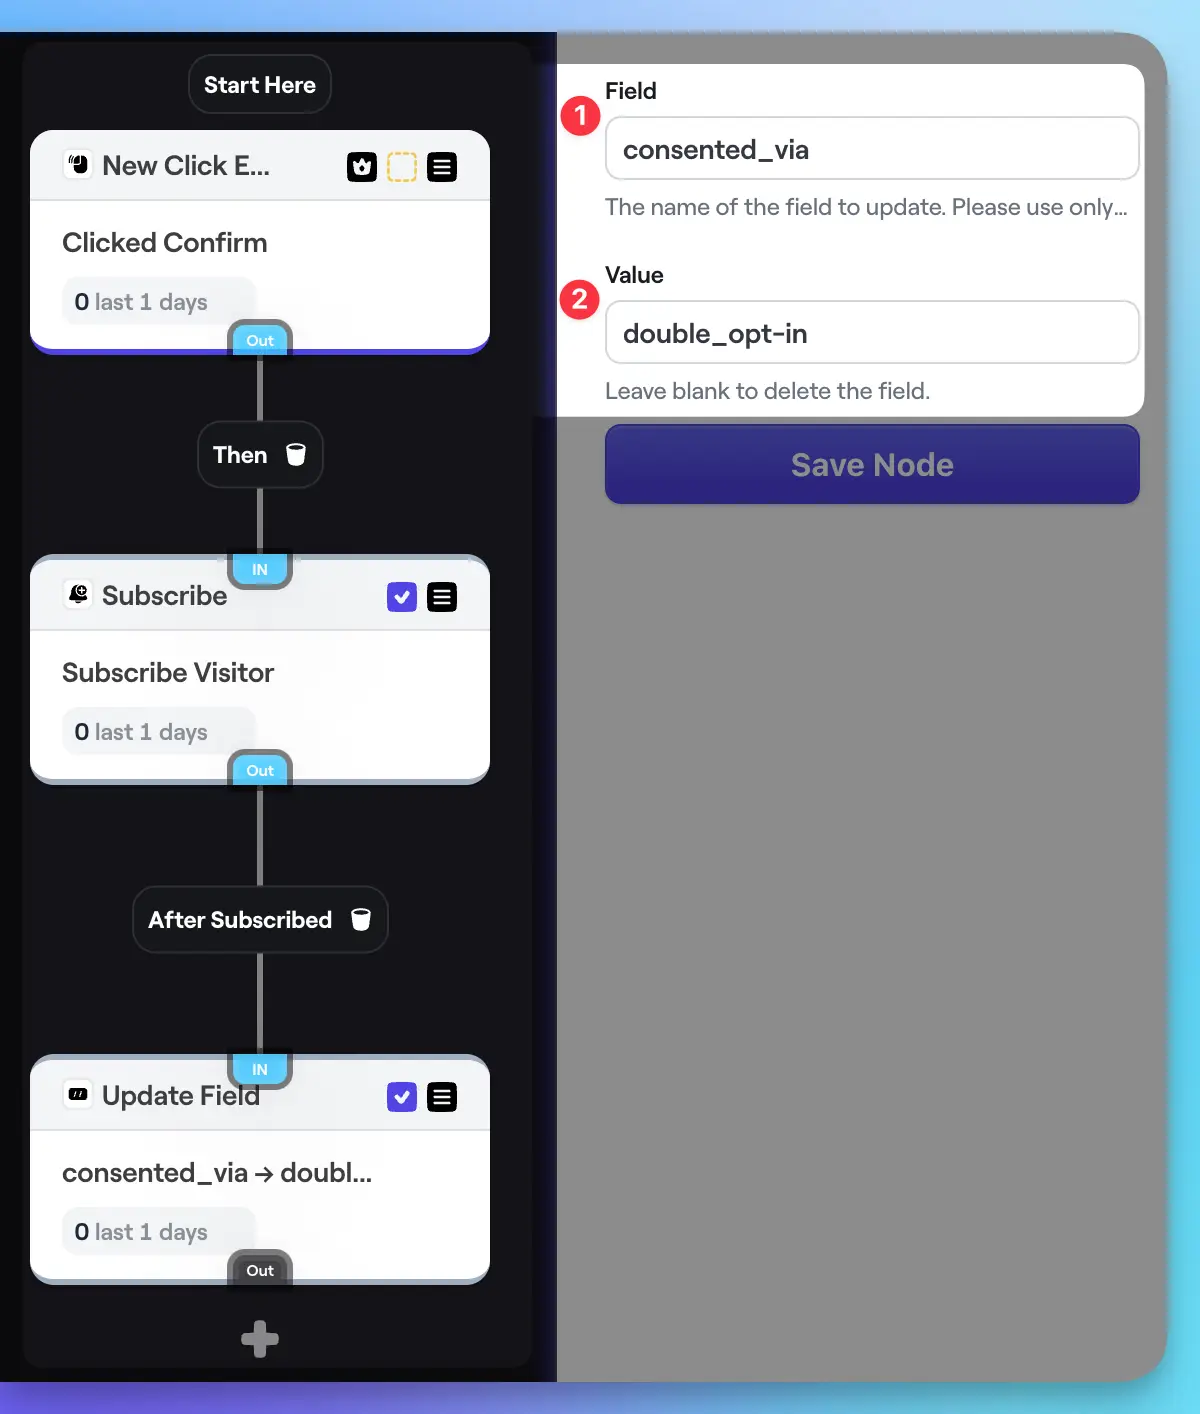
consented_via field to indicate the user has completed double opt-in. This allows us to search and track metrics again and provides an audit trail. Name the field 1 anything you like. Both the name and value 2 support Liquid tags like {event} for dynamic use cases. Bonus: Customising for EU Customers
Many users expand on this basic flow by adding a check for European visitors. Here's how:
- After the initial sign up event, use a Split to check if the visitor is from the EU.
- If they are, proceed with the double opt-in flow - unsubscribe, send confirmation email, resubscribe on click.
- If they're not an EU customer, you can skip the confirmation and do nothing (or whatever else fits your use case).
This lets you apply the stricter consent requirements only where needed.
Wrapping Up
Setting up a double opt-in flow in Bento is straightforward once you understand the key concepts:
- Handle different opt-in methods differently
- Unsubscribe and leave a reason to enable segmenting
- Use transactional emails and click triggers for the confirmation
- Record the consent method on the user's profile
- Optionally check for EU customers to apply flow selectively
With these building blocks, you can create a consent flow that meets your unique needs and keeps you compliant.
And if you have any other questions, feel free to ask in the Bento Discord!