How to setup your DNS records for Bento.
To ensure your emails are delivered successfully, we need to add the necessary DNS records for your domain. By doing this, you authenticate your domain, allowing Bento to send emails on your behalf without any hitches. This essential step not only boosts your email deliverability but also enhances your sender reputation. As a result, your emails are more likely to land in your users' inboxes rather than getting lost in the spam folder or bouncing back. Let's dive into it.
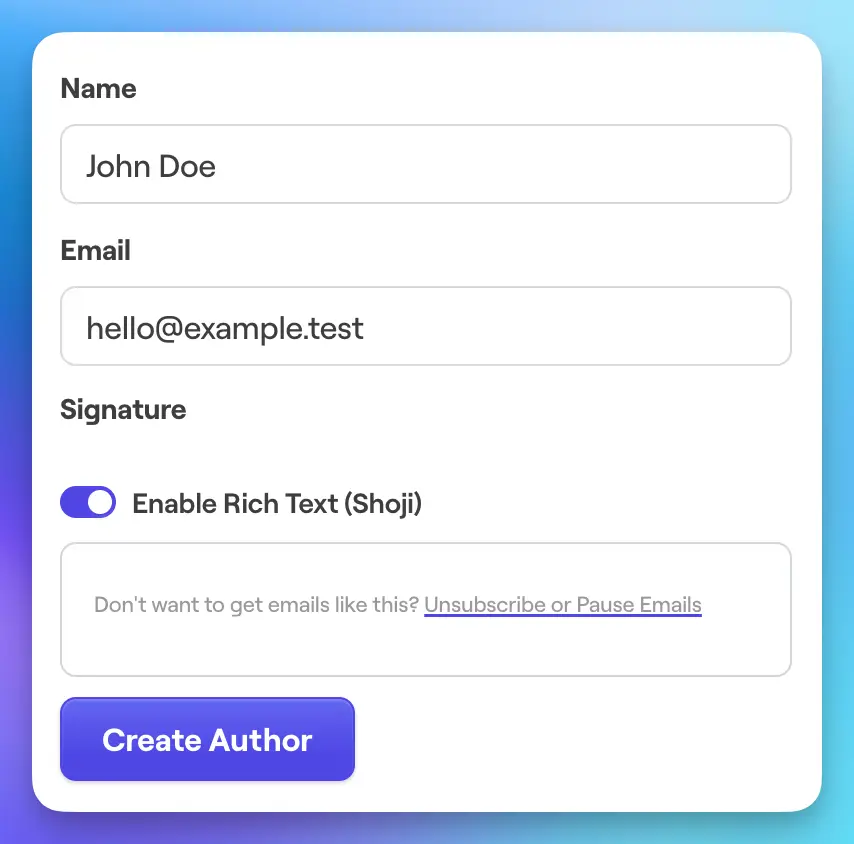
This can be done in the Email -> Authors screen within the Bento platform.
To get started, configure the address you wish to use, such as hello or support, along with the corresponding email address like hello@example.com.
This new author email should reflect the purpose it will serve, whether it’s for customer support, marketing, or general inquiries.
Once you have input and saved this information, our system will automatically generate the necessary DNS records for you.
Each domain you will be sending email from requires 5 DNS records to be added. You can find them at Deliverability > DNS Records on the bento platform. Before you add the records to your domain and we verify them the domain will appear like this.
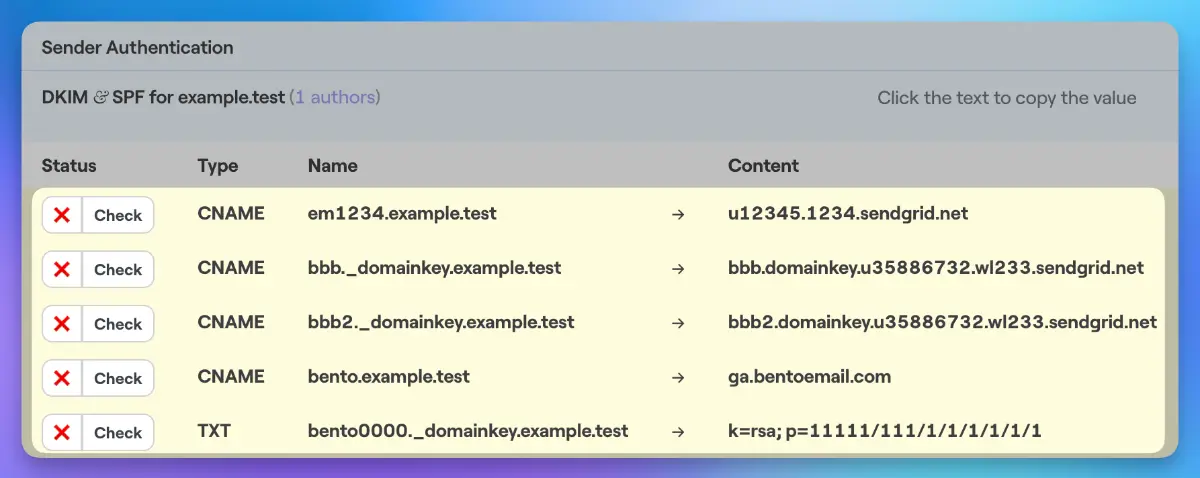
em1234.example.test) to copy it easily, avoiding entry errors.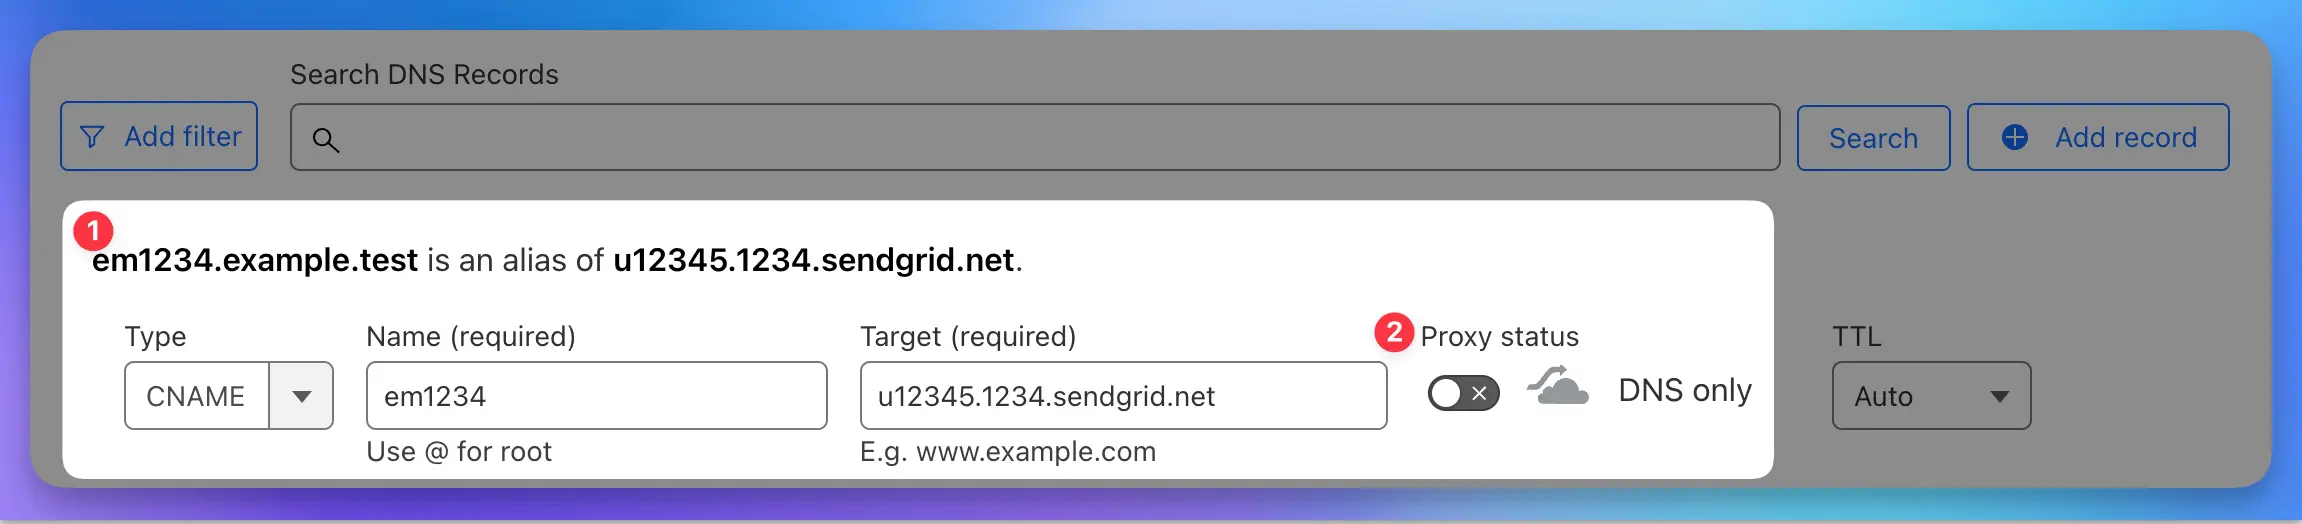
As you fill in the field, take note that the DNS entry you are creating is displayed 1. Ensure it matches exactly what you are being asked to create in Bento, as discrepancies can cause prevent verification.
Here you can see we have created em1234.example.test as a CNAME, and importantly, we have turned off Cloudflare's proxy 2. This step is crucial as enabling the proxy can lead to issues with verification, and we strongly advise against using it in this context.
Different providers have varying requirements when it comes to DNS record entries. Some will only require the portion before your domain name, such as em1234 for em1234.example.com. In contrast, others will need the complete record. Understanding these differences is essential for successful DNS configuration.
Ultimately, correct configuration is key to a smooth verification process, so double-check each entry for accuracy. If any issues arise, consulting your DNS provider’s documentation or support can provide further guidance.
name portion. So, instead of enterring em1234.example.com you will need to enter em1234.Once the records are entered into your DNS host, we can move back to bento to check if they validate. You can click on the "check" button 1, which will allow you to verify if the records are replicating properly and resolving correctly. This feature provides a real-time validation of your configurations, ensuring that everything is functioning as expected.
This can be an important step if you are unsure whether the records you created in the previous step are accurate or if you suspect any discrepancies. By utilizing this tool, you can proactively identify and address any potential issues.
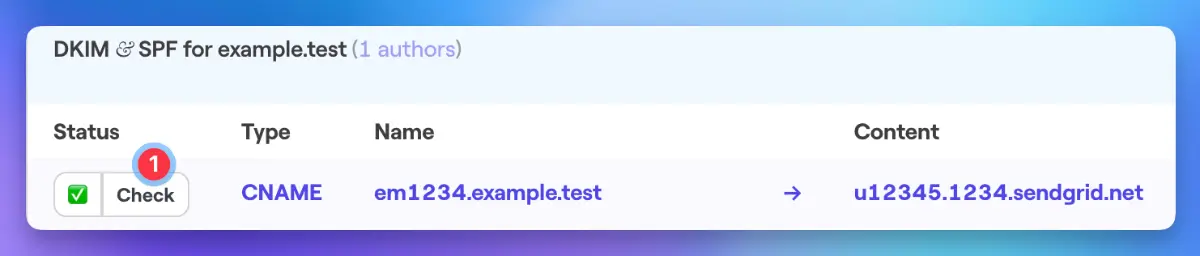
As you can see, once the records are validated by Bento, they will be marked with a green check mark and the accompanying text will turn a vibrant blue. This is a visual confirmation that a record has been accurately validated. When all five records display these indicators, your DNS setup is successfully completed!
This process is unfortunately technical but a required one to let us send verified email on your behalf. If you have any other questions, feel free to ask in the Bento Discord!